Pages

Fix For Error "Page cannot be displayed"

Connected To The Internet But Page Showing Cannot be displayed

Have you experience the issue where your computer's status is indicating connected to Internet, but you can't access any webpage? I have noticed this issue occur when there are several tabs and browsers open in my pc. My browser's settings is set to open where it left off, and usually I have more or less 15 websites open in each 3 browsers. So when I start the browser, it automatically request replies from all those website causing congestion in my IP address. 
Here are the troubleshooting steps I have tried and get the issue resolved. 

 1. Restart the pc. 

          Restarting the computer will refresh the network adapter as well as your connection from the router or modem. Sometimes it gets the job done. 

2. If restarting the pc didn't work, then reset the TCP/IP 

          TCP/IP is a set of communications protocols used for the Internet. 

To reset the TCP/IP; 

  1. Open and run the command prompt as Administrator. 

  2. Type: "netsh int ip reset resetlog.txt" and hit enter 

  3. Restart the computer 


3. If the previous troubleshooting doesn't work? Flush the computer's DNS cache

   1. Run cmd as administrator and type "ipconfig/flushdns" and hit enter. It will clear the DNS.


  2. Type "ipconfig/registerdns" and hit enter. 

That should be it. Now try to see if you can access the web page. 

4. In case it won't still work. Refresh the TCP/IP

     1. Run the cmd as administrator, type "ipconfig/release" hit enter. 

     2. Type “ipconfig/renew” and hit enter.


5. If after all these troubleshooting and you're still having the same issue, then you will need to update your network drivers from the device manager. 

Changing Windows PC Background Log-on Screen

Changing Windows PC background log-on screen

 
Alright, you probably has already downloaded the tool, if not, you can find the link below. Keep reading... As promise in the notes, I will be giving you the password here. See below; 

The password is rorounicosine 

This tutorial would be about how you can change your windows logon screen with just a few clicks.
 
We all want something new to see in our computer, that’s why we keep changing our Windows themes, desktop image, and even icons for the computer applications.
 
Now, here’s the tool that would definitely help you out. I’m sure you’ll like how easy it is to use. Just follow the three simple steps below. Hopefully it's clear, and if ever you have any question I will be happy to reply to your comment. 
 
Without further introduction, here are the steps; 
 
Step 1 Download the tool here: rorounicos  

Before anything else, you will need to download the tool first. Click the link and come back here after you have downloaded the tool. 

Step 2 Extract and install the file 

I believe you now have the tool so let’s go to the next step. Extract and install the tool. I guarantee it is 100% virus free. I scanned it with Malwarebytes and AVG before I uploaded it.  

Changing Startup Background
 
Step 3 Open the file and start changing your logon screen image 
 
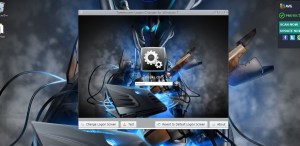
Open the program and click on the “Change Logon Screen”. It will give you the option to select a file or picture you want to use. 
 
Changing Startup Background
 
Select the picture you want to use for the startup screen and that should be it. You can also click on the “Test” button to check how it looks like using the picture you selected.
 
Hopefully you like my short tutorial and again, if you have any question please don’t hesitate to comment below. Thank you. 

Solved Windows 8 App Not Launching

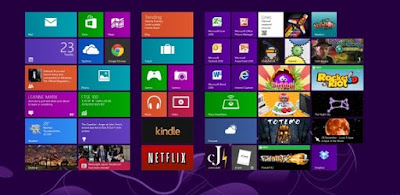
Fix for Windows 8 App Not Launching

When troubleshooting Windows 8 Apps, you should always remember to start with the basics. The basic information you’ll need to know are; 

Windows 8 app not launching

1. The UAC (User Account Control) should be set to enable.

2. You need an active Internet connection and at least 1024 x 768 resolution to access the Windows App Store

3. To enable snap apps, you need a screen resolution of at least 1366 x 768

4. You need to use a Microsoft Account 
Now, you have learned the basic information, let’s get to troubleshoot some common issues with the Apps for Windows 8. 

Unable to open Windows 8 Apps or prompted with error “not working correctly”

1. Make sure you verify the basic information above.

2. Download and run the Windows 8 App troubleshooter.

If you’ll have issues with running the troubleshooter, you can perform the manual steps below.

1. Perform Windows Clean boot. Click here (Computer clean boot)

2. Check for Updates for the App(s) in Store.

3. Run the sfc /scannow – It will automatically search and fix computer integrity violations.

  a.  Go to start and search for “cmd”

  b.  Right click on it and click on “run as administrator”

  c.  Type “sfc /scannow” – this may take a while to finish.

4. Uninstall third party Antivirus (McAfee, Norton, etc…) this issue is mostly caused by outdated Antivirus software.

  a. You may look for your Antivirus Removal tool here http://experts.windows.com/w/experts_wiki/156.aspx

5. Sync the App License – You can sync the App license in the App Store

6. The video card driver of your computer should be updated with the driver for windows 8.

7. Make sure that you are not using a Proxy or VPN.

8. If the App still won’t work, contact the App developer. 


Unable to re-install the App | can’t locate the App after uninstalling 

If you have uninstalled an App on windows 8, it will automatically go to “Your App”. You can access it through the Store App from the start screen.

Can’t Open Windows 8 Store App

1. Verify the basic apps information.

2. Uninstall the antivirus, it may sometimes prevent the app from launching.

3. Run the sfc/scannow. Refer to instruction above.

4. Perform computer clean boot. 

5. Make sure you are not using a proxy server. 

6. Make sure you are login using a Microsoft Account. 

Note: Windows defender will automatically enable after you uninstall your antivirus. Windows defender is an antivirus built-in to windows 8. It receives latest update for virus signature directly from Microsoft.

If all the troubleshooting steps above will not fix the problem, check the Windows Adminsitrative Events for the details of the error. All the error will be listed as AppHost.

For questions and clarification, just comment below. Thanks for reading.

Microsoft Office 2013 Installation issues | Solution Part 2

Microsoft Office 365 | 2013 Errors

Microsoft Office 2013 is the newest version of Office application from Microsoft. Since this is a newer software release, we will be expecting several bugs or issues that are yet discovered. Here are some of the most common issues and fix for Microsoft Office 2013.
 
Something went wrong

Office 2013 pc applications crashes after installation
 
This issue could be caused by the add-ins for the application. Try removing the add-ins, remove the dock bar, and restart the computer.
 
Language Pack Reflecting on Office 2013 PC My Account Page is Not English
 
The probable cause of this issue is that, you have tried redeeming a free upgrade through http://office.com/setup then after a successful redemption, the installer was set to a different language.
 
It can also possibly cause by the IP address that you used while redeeming the product. These are just probable causes.
 
To get through this, you will need to install the Language pack manually though this link http://www.microsoft.com/en-us/download/details.aspx?id=30354 .
 
The above link gives a free download of 32 bit and 64 bit version of the English Language Pack.

Unable to access My Account page or product already redeemed issue
 
In this instances you can access this direct link: http://tiny.cc/2013office.
 
This link contains the bootsrapper file (x86). The link came from the Microsoft Store Team. You can either click on the link and enter the product key, or type in your Microsoft Account.

Error: Check the Internet Connection or Hard Drive Space while installing Office 2013
 
The probable causes of this is that, there could be not enough space on the C: Hard Drive or there is a problem with the internet connection.
 
Resolution:
1. Check if the hard drive has enough space. Make sure it has at least 3.0 GB available.
 
2. Make sure that you are getting a stable internet connection. Installation for the click to run office 2013 bootstrapper file will not push though in this instance and will cause the error to appear.

Error: Something went wrong while installing Office 2013 Perpetual/Office 365 Home Premium
 
Resolution:
1. Most probably there are fragments of the Office 2013 files. Uninstall the MS Office completely out of the computer. You can run the fixit tool in this link support http://support.microsoft.com/kb/2739501
 
2. Re-install Office 2013 through the Office my account page.

If you have any question, feel free to comment below. Thanks

Most Effective Virus Removal Method

Free Online PC Virus/Malware Scanner - Making sure your Windows computer is secured

The most common problem among Windows operating system users are Virus/Malware. I have been dealing with these problem for years in my stay at Microsoft as a technician and I can say that at first it would appear to be complicated. But when you get used to it, it becomes really easy.

Most common signs that your computer is infected with a virus are;

Computer takes time to boot. There are several factors why the computer boots slow. These could be cause by a missing or corrupted system components, startup programs, multiple antivirus, and virus infection.

Several tool bars and pop-up on the browser. When you download something, be sure not to check those unnecessary add-ins and download only the program you need. Those extra programs might serve as a backdoor for malware.

You got redirected to a specific page. This is caused by a malware taking over the browser's settings. This is one of the most common indication that the computer is infected.

There are hundreds of causes why the computer got infected with a virus. These are just the basic signs for the majority of the users. This tutorial will apply to Windows XP, Vista, 7, and 8. These tools can be downloaded for FREE.

Step 1. Run a rootkit removal tool.
It is important that you run this tool first, because rookit is responsible for hiding malware/viruses in the system. Download and run this software from Kaspersky Internet Security.

Kaspersky rootkit removal


Step 2. Download and run the ESET Online Scanner.
This is one of my favorite free virus removal tool since it really digs the system and removes those malicious software hidden in the computer. This tool takes time to finish but it's worth to wait.

Eset online scanner

Step 3. Third but not the least. Download and run the HitmanPro 3.
This is a second opinion virus scanner/removal tools. This will check for infected files and deletes threats found.

Free hitmanpro


Note: These tools requires a stable Internet connection as it runs using cloud technology.

Opitimize Windows Startup | Windows Clean boot

Windows Clean Boot

PERFORM Windows clean boot, disable unnecessary programs from running on the background.

fast windows startup

One of the basic thing you should do when troubleshooting a computer is performing a pc clean boot.

Clean boot means disabling all unnecessary application to run in the background. This will make the computer's performance faster since the processor will be focus only in the windows system components.

This will also let's you determine if the issue is caused by a third
party application on the computer.

The first part of the tutorial is for Windows XP PC

Step 1: Click start, then go to run. Type "msconfig" and click OK. The System Configuration Utility diaglog box will display.

Step 2: On the General tab, select on the Selective Startup.

Step 3: Uncheck the Process SYSTEM.INI File, Process WIN.INI File, Load Startup Items.
note: Make sure that the Load System Services and Use Original BOOT.INI is checked.

Step 4: Go to the Services tab. Click to check the Hide All Microsoft Services box and click on disable. Again make sure that you click to check the Hide All Microsoft Services box.

Step 5: Click OK and restart the pc.

For Windows Vista, 7, and 8 pc

Step 1:
Go to the start button and on the search box type "run" and hit enter or press and hold the Windows key on your keyboard + R. Type "msconfig" and click OK. The System Configuration window will open.

Step 2:
On the General tab, select on the Selective startup. Uncheck the Load startup items.

Step 3:
Go to the Services tab. Click to check on the Hide all Microsoft services box. Click on Disable all and click OK. Restart the computer.

Note: This is for troubleshooting purposes only. To revert the settings back to normal, go back to the System Configuration window and click on Normal Startup.
If  you have any question please don't hesitate to leave your comment.

Manual Wireless Router Setup | How to Setup Wireless Router

How to configure your wireless router manually?

If you want to share the Internet connection you get from your modem to multiple devices, then you definitely need to a router. I will be teaching you what router is, how it works, and how to set it up initially.

First, what is a router? A router is a device used to translate the IP address from the modem and be shared to multiple wired and wireless devices. How does it work? The router is basically, the receptor of the internet connection from the modem, and distributes to multiple connections. How to set it up initially? Follow the steps below.

There are router's that came with a software to guide you through the installation process. However, what I am going to teach you today is how to manually configure or set it up. The advantage of this process is that it is applicable to almost all routers in the market.


Linksys Router Setup

Step 1 Know the physical connection.

        This means that, you must make sure that the cables are plugged in to their respective ports. The Ethernet cable from the modem should be connected to the Internet port of the Router. Then use another cable and connect it from, let's say port no. 1 (or 2, 3, 4 it doesn't matter) and connect it to your computer's Ethernet port. Before you proceed make sure that you have follow this instruction carefully, or it will not work.

Step 2 Check for the default Gateway of the router

         Default Gateway is the IP Address to access the router's user interface. To check for the default Gateway, click on the Start button. On the search box type "CMD" and hit enter. On the command prompt window, type "ipconfig /all”. Look for the physical address. Most default Gateway is 192.168.1.1. In the picture below, it is 192.168.201.1.

Step 3 Access the User Interface of the router

          The user interface contains the basic to advance settings of the router. This is where we do the configuration part. To access the UI (User Interface), open a browser (IE,Firefox,Chrome, etc.). Type the DG (Default Gateway) of the router. It this tutorial, the DG is 192.168.201.1, again most router's use 192.168.1.1. Usually the username would be "admin" and the password is "password". This depends on what brand of router you used. You can search it online.

Step 4 Setup the wireless settings

            This is where you setup your WIFI or Network name. Click on the wireless tab and on the configuration type, select manual. Key in your preferred Wifi/Network name and click save.

Step 5 Create a password for you wireless network.

           There are several types of Wireless Security encryption. What I always used is WPA/WPA2. This will enable the wireless N feature of the router. It will also broadcast stable and secure wireless connection.

Remember that the password or passkey should be at least 8 characters and it is case sensitive.

Done! Save the settings and you have now successfully manually configure your router. The Wifi name is the one you setup earlier, and the password is the passkey you also setup.

If you have any questions please don't hesitate to comment below. Thanks!

Microsoft Office 2013 Installation Error | Solutions

Some of the most common Microsoft Office 2013 installation issues

Something went wrong
 
Error: "Stuck @ 19%: “Microsoft Excel is waiting for another application to complete an OLE action. Excel is running into problems with the 'btmoffice.connect' add-in. If this keeps happening, disable this add-in and check for available updates. Do you want to disable it now?"
 
Solution: Manual Uninstall http://support.microsoft.com/kb/2739501
 
Error: "We're Sorry we ran into problem while trying to install the product key. If this keeps happening, you should try repairing your office product (System error: Oxc004e01c)"
 
Solution: Deactivate Office and re-download Office 365 Trial – re-enter CC info and retry sign in.
 
Error: "We're sorry, something went wrong and we can't do this for you right now. Please try again later." 0x8004FC12
 
Solution: open CMD and add the service “Net localgroup Administrators localservice /add” restart the machine and reactivate Office.
 
Error: "Blank UI or the UI disappears when hover in Office programs. Or your video driver might crash or hang."
 
Solution: Try to update your video card driver and/or click File > Options > Advanced > Display, and then check the Disable Video Hardware acceleration box.
 
If you don’t see this box, you can set the regkeyDisableHardwareAcceleration = 1 in Computer\HKEY_CURRENT_USER\Software\Microsoft\Office\15.0\Common\Graphics
Error: "Cannot verify the license for this application. A repair attempt failed or canceled."
 
Solution: Manual Uninstall http://support.microsoft.com/kb/2739501
Error: "Language setting is not English."
 
Resolution:

Uninstall the current Office

Login to the office account (http://office.microsoft.com/myaccount)

Use the option “Install Using a Disc”

Choose “I have my own DVD” – Take note of the Product key

Once prompted to enter the PK – the next step is going to ask you “Which Country” and the “Language” under a drop down menu

Once you’ve entered the correct options among the list.

The next step is a button for you to click and Download.
Once you will download the installer – you will notice on the name of the file “xxxxxxxxxxxxUS_ENxxxxxxx”.

Run the setup installation and that should be the correct language setting once it’s done.
Error: "Office encountered an error during Setup (boot strap error)"

Solution:
Perform Operating System Inplace Upgrade, then reinstall Office.
Error: "Auto Complete feature in Outlook 2013 and Calender items are missing"
 
Solution: 
Check if other profile or computer works – import .nk2 or profile: http://support.microsoft.com/kb/980542
Error: "Outlook crashes every time you try to search."
Outlook can crash when you are running Windows 7, Windows Server 2008, or Windows 8 pre-release builds

Solution:

1. To use search again, you must delete the offending cache files by doing the following:

2. Delete all files under C:\ProgramData\Microsoft\Windows\Caches\.

3. You might have end several processes to get everything deleted.

4. Delete all files under C:\Users\<UserName>\AppData\Local\Microsoft\Windows\Caches\,

5. Where <UserName> is the name of the Windows user.

6. Restart your pc.

If you have any question, clarification, etc... feel free to comment below. Thanks