Pages

Secure Boot Failure Fix for Windows 8.1

How to fix Secure Boot failure

Error: Boot failure: a proper digital signature was not found. One of the files on the selected bott device was rejected by a Secure Boot failure.

1. Restart the Computer by holding the power button.

2. While the computer starts to boot, keep pressing F12 until the boot option comes out.

3. Go to the settings. Look for the Secure Boot option and disable it.

attempt secure boot
attempt secure boot

4. Go to the advance system configuration. Change the boot mode from UEFI Boot to CMS boot. This will change the sata controller to AHCI.

5. Press F10 and hit Y to save the changes made and restart the computer.

Bios Setup Utility
Bios Setup Utility

6. Press F12 again to get into the boot menu, and select LAN.

7. If everything goes well, it should start talking to the WDS. Press F12 to get into the Windows Boot Manager and select the Diagnostic recovery tool.

8. That's it. Windows should now be loading the files.

Windows loading files


Hope you find this useful. Thanks for reading. Peace out!

Windows 8.1 Desktop Wallpaper to StartScreen Background Trick

How to Make Desktop Wallpaper As Your Desktop Background in Windows 8.1?

If you have a cool desktop wallpaper, you can now set that as your start screen background. No third party software needed. Windows 8.1 tricks.

Follow the steps below;

1. Right click on the taskbar and click properties.


2. Click on the Navigation tab, check on the box for "Show my desktop background on Start".


That's it! For more information about Windows 8, visit http://inwindows8.com


Windows 8 and Windows 8.1 Compatibility issues Fix


There are several programs that might run with Windows 7 but not with Windows 8. Most of these programs are built for Windows Vista or XP. For example, the power management option for Lenovo G470 laptop which we will be using as an example for this tutorial today. This will answer your question on how to run compatibility mode for Windows 8.

Power Management option is an essential program I use to preserve my laptop's battery without sacrificing its performance. This is one of the program I must have working on my computer. The problem is, when I updated to Windows 8 and 8.1, this application will not work due to compatibility. I usually get this error message "This program has compatibility issues"
then it won't allow me to use the application. The keyword here is the error message. If you get this error message to any programs you have after upgrading to Windows 8, then this troubleshooting I will be teaching you today will surely help.

1. Go to the startscreen, and locate the application. Right click on it, and select file location.

windows 8 opening file location

2. Now right click on the program and click properties.

Right click on the program to run in compatibility mode for Windows 8

3. Click on the Compatibility tab, and check on the "Run this program in compatibility mode for;

running Windows 8 compatibility mode

4. If it was working with your Windows 7 before, then select Windows 7. Hit "Apply", then click "OK".

Windows 8 compatibility settings to Windows 7

5. Test the program by opening it. In this example, the Energy Management successfully run with Windows 8 without the compatibility error now.

Lenovo Power Management

That's it. If the program runs in Windows 7, it will definitely run with Windows 8 as well.

How to Run Android App on Your PC?


Did you know that you can play any android app on your PC? Yes, you heard it right. BlueStacks App Player lets you run apps from your phone fast and fullscreen on Windows computer.

Lets get started. Follow the simple instructions below;

1. Download and install the App player from this link

BlueStack Android App Player

2. Click Continue.

BlueStack Android App Player Installation

3. You can uncheck the App Notifications and Subscribe to Spotlight and Cilck Install. These are optional. See Screenshot

BlueStack Android App Player Installation in Progress

4. Wait for a few minutes while the App is in progress.

BlueStack Android App Player Installation in Progress


loading bluestack app player for Windows


5. Once the installation completed, you can also synchornize your app here. Click On the lower right corner of you screen if you want to minimize it. 

minimize Bluestack

That's it! Enjoy!


Can't see Windows 8.1 Upgrade Option


OS: Windows 8.1
Issue: Windows 8.1 not showing on MS Store.

windows 8.1 update error

1. Make sure that the GDR update is installed KB2871389

2. Make sure that you are not using a Volume License, Enterprise Edition of Windows 8, or a Preview version of Windows 8/8.1

3. Run WSRESET.exe from a command line.

   1. Press the Windows key on the keyboard and press "S"
   2. Type "CMD". Right click on it and click on "run as administrator"
   3. Type "WSRESET.exe"

4. Sync you App License:

   1. On the Start screen, tap or click Store to open the Windows Store.
   2. Swipe in from the right edge of the screen, and then tap Settings.

   3. (If you're using a mouse, point to the lower-right corner of the screen, move the mouse pointer up, and then click Settings.)

   4. Tap or click App updates.

   5. Tap or click Sync licenses.

5. Make sure that the following services and running:

   1. Press the Windows key on the keyboard and press R

   2. type "services.msc"

   3. Make sure that the BITS, Windows update, and Cryptographic Services are all started and set to automatic. If not, right click on the service and click properties. Set the startup type to Automatic, and click start so the service status will say started.

5. Open Internet Explorer, and type the following in the address bar
ms-windows-store:windowsupgrade


If this process won't work, then proceed to the steps below;

     1.  Open MS Store App
     2.  On MS Store App – Open Charms Bar
     3.  Go to Settings – Choose App Updates
     4.  Click Sync Licenses.
     5.  Click Start – Type “WSRESET” –  Run as Administrator

windows 8.1 update is here

The Windows 8.1 Upgrade Option should appear now.


Couldn't update to Windows 8.1 - 0xC1900101 - 0x40017


Couldn't update to Windows 8.1 - 0xC1900101 - 0x40017


Method 1: Perform hardware clean boot.

Sometimes external devices interfere the update process. It's best to eliminate this probability by disconnecting all unnecessary external devices connected to the computer (except the mouse and keyboard.


Method 2: Update the devices drivers on the computer.

Go to the Windows update program by going to start > type "Windows update" on the search box > check for the important and optional updates > Install.

IF there's no updates for the driver listed, go to the manufacturers website, on the download section type the exact model number of the computer and manually check for driver updates.


Fix for Windows Update Error 0x80200010

0x80200010  There are currently no active network connections. Background Intelligent Transfer Service (BITS) will try again when an adapter is connected.


Cause:

This error will occur if the Background Intelligent Transfer Service (BITS) is not responding due to proxy settings that does not support HTTP/1.1 protocol. This error will usually appear when you try to connect to the Microsoft Windows Update.

Solution:

Follow the steps below to resolve this issue.

1. Make sure you are connected to the Internet.

Verify your connection to the internet by browsing different websites just to make sure you're not looking at a cache page.

2. Clear the BITS queue

1. Open a notepad.

2. Type the following;

For Windows XP, Windows 2000, or Windows Server 2003

net stop bits
net stop wuauserv
Ipconfig /flushdns
cd "Documents and Settings\All Users\Application Data\Microsoft\Network\Downloader"
del qmgr0.dat
del qmgr1.dat
net start bits
net start wuauserv

Windows Update error 0x80200010

3. Save the file to the desktop as ClearBITS.bat

Windows Update error 0x80200010 save as

4. Double click on the file from the desktop to run.

5. Now try installing the update again.

For Windows Vista and Windows Server 2008

1. Copy and paste the following command on a notepad.

net stop bits
net stop wuauserv
Ipconfig /flushdns
cd "Documents and Settings\All Users\Application Data\Microsoft\Network\Downloader"
del qmgr0.dat
del qmgr1.dat
net start bits
net start wuauserv

2. Save it as clearBITS.bat

3. Right click on it and click "run as administrator"

4. Try to install the Updates again.


Note: This troubleshooting is best effective if you're computer is running on clean boot. 


microsoft help microsoft fix it download microsoft fix it center troubleshooting repair error

Free 2-3 Mbps Mac Address for Globe Wimax


Free 2-3 Mbps Mac Address for Globe Wimax Models BM622, BM622i, BM621, BM625

All working MAC, tried and tested in BM622..

free 2-3 mbps mac

34:6B:D3:8F:82:94
34:6B:D3:8F:9D:AC
64:16:F0:C5:25:04
5C:4C:A9:C0:B4:B0
20:2B:C1:E0:79:1B
34:6B:D3:8F:F3:54
5C:4C:A9:C0:EB:68
04:C0:6F:5E:91:F6
34:6B:D3:8F:F3:14
64:16:F0:C5:1B:CE
04:C0:6F:61:0E:70
34:6B:D3:8F:CE:68

Choose your stable frequency and enjoy!

To be continued... Watch out VIP MAC hunters!


Update 12/5/2013

It's your call...

InstDate    PlanID    Amount    MacAddress    ModemSerialNo
2/21/2013    BWX02    1099    40:4D:8E:8B:17:F8 not working
2/21/2013    BWX02    1099    346BD38FFEFC    510772668211008000
2/27/2013    BWX02    1099    64:16:F0:B1:4B:D8    500807778003016000
2/25/2013    BWX02    1099    28:5F:DB:28:20:AC  500810118104024000
3/3/2013     DWX02    999     346BD38FF244    510772668211007000
2/26/2013    DWX02    999     346BD38FF628    510772668211008000
2/26/2013    DWX02    999     202BC1E0A8A3    500810118105037000
2/21/2013    BWX02    1099    64:16:F0:C6:02:34  500807778005004000
2/27/2013    DWX02    999     C8D15E24B05C    510772668204011000
2/27/2013    DWX02    999     346BD38FBD0C    510772668211004000
2/28/2013    DWX02    999     346BD38FFD28    510772668211008000
3/2/2013     DWX04    799     C8D15E247118    510772668204007000
2/28/2013    DWX02    999     346BD38FB8C8    510772668211004000
2/28/2013    DWX02    999     4C54996D985B    500807778007004000
2/28/2013    BWX02    1099    346BD348FE4C    510772668210006000
2/28/2013    DWX02    999     C8D15E249228    510772668204009000
2/28/2013    DWX02    999     4C54996DC479    500807778007009000
3/2/2013     DWX02    999     C8D15E249824    510772668204010000
3/1/2013     DWX01    999     346BD38FD9E4    510772668211006000

Update January 6, 2014

04:C0:6F:02:AB:BC
64:16:F0:C5:60:66
40:4D:8E:8B:13:04
5C:4C:A9:C0:CB:E0
20:2B:C1:E0:DC:EF
64:16:F0:7B:EE:28
20:2B:C1:E0:C3:3B
20:2B:C1:AA:FE:E7
64:16:F0:B1:15:9C 


Note: Use it at your own risk!

How to Unhide Virus Infected Files?


There are types of viruses that will hide files and folders in your flash drive. When you open the drive, you don't see any files but the storage is still showing that there are data on it. This is mainly cause by a virus and can't be fixed by just running an antivirus. Although the virus will be removed, but it will not undo what the virus has done hiding files.

To reveal the hidden files, follow the steps below.

1. Go to start and type "cmd" on the search box.

2. Right click on it and select "run as administrator"


3. Go to start and click on "computer". Look for the directory for the flash drive. Ex. e: removable

4. Back to the command prompt, type " E: " hit enter.

5. Type " attrib -s -h /s /d " and press enter.


That's it! All the folders and files will now appear.


Extend Windows 7 OS trial period Trick


The question is "How do I extend the trial period of my Windows 7"? This tricks works for all versions of Windows 7.

Unlike Windows 8 that won't allow you to proceed with the installation without a product key, Windows 7 can be installed and activated later. Windows will give you 30-days trial period that allows you to use the operating system with it's full functionality. However, after 30-days it will begin to remind you that you need to activate your copy of Windows 7, and will begin to limit the functionality of the computer. The operating system is expensive. The price ranges from Php5k-11k per license, but you can always get it from us for an extremely low price. PM me if you want one.

Now this trick comes in. There is a command in Windows 7 that will allow you to extend the trial version and continue to use the operating system without reduce functionality. Note that, this trick will only work if you are still under the 30-days trial version. For example, your on the 29th day of the trial period. You can extend it back to 30-days by performing this trick.

To extend the trial version of your Windows 7, follow these steps;

1. Go to start, and search for "cmd". Right click on it an click on "run as administrator"


2. Now, type " slmgr -rearm " and hit enter.


3. Wait for 3-10 seconds and a message will appear that the command completed successfully and you need to restart the computer.


That's it! You can now enjoy the extended trial version of your Windows 7.


Quick look of the Acer Aspire V5-572O-6858


Are you looking for a high-end yet affordable Windows 8 computer? then you need to consider the new Acer Aspire V5. It has 15.6-inch screen which is perfect for watching movies, and it's powered by Intel core i5 which is perfect for playing most of the latest PC games. It has a multi-gesture touchpad with large working area and enhanced sensitivity providing the excellent responsiveness and speed.

Are you looking for a high-end yet affordable Windows 8 computer? then you need to consider the new Acer Aspire V5. It has 15.6-inch screen which is perfect for watching movies, and it's powered by Intel core i5 which is perfect for playing most of the latest PC games.

Acer Aspire V5-572O-6858 is one of the best selling laptop from Microsoftstore right now. It has 15.6-inch Full HD touchscreen, 4 GB RAM and 500 GB HDD, Intel Core i5-3337U, and has a battery life of up to 4.5 hours. It can also be upgraded to Windows 8.1 for free from the store app on the Windows 8.

It's very mobile as well, it only weighs 5 lbs which is very light and perfect if you're bringing you're laptop with you when you travel.

Overall, considering the price, performance, and mobility, I'll rate this 4.5 out of 5 because I don't like HDD. read here to know more about the different types of hard drive.


Price range:

Php 21,000.00 - Php 30,000.00


Pricelist for SM Cyberzone Cebu


This latest pricelist for SM Cyberzone. These includes laptops, cellphone, tablets, and all other electronic devices.

In Cebu, they are located at the Second Floor North Wing and Main Mall Building C, North Reclamation Area, Cebu City, they also have branches in SM City Consolation and SM City Bacolod.

See the list below;

Price list for laptops, cellphone, tablets, and all other electronic devices

Price list for laptops, cellphone, tablets, and all other electronic devices

page 3 Price list for laptops, cellphone, tablets, and all other electronic devices

page 4 Price list for laptops, cellphone, tablets, and all other electronic devices

page 5 Price list for laptops, cellphone, tablets, and all other electronic devices

page 6 Price list for laptops, cellphone, tablets, and all other electronic devices

page 7 Price list for laptops, cellphone, tablets, and all other electronic devices

page 8 Price list for laptops, cellphone, tablets, and all other electronic devices

page 9 Price list for laptops, cellphone, tablets, and all other electronic devices

page 10 Price list for laptops, cellphone, tablets, and all other electronic devices

page 11 Price list for laptops, cellphone, tablets, and all other electronic devices

page 12 Price list for laptops, cellphone, tablets, and all other electronic devices

page 13 Price list for laptops, cellphone, tablets, and all other electronic devices

page 14 Price list for laptops, cellphone, tablets, and all other electronic devices


This post will be updated every month.

Samsung ATIV 500T Smart PC Review


I had the chance to look closely and test the latest Samsung ATIV Smart PC, and I was amazed with how fast and mobile it is. It really defines the combination of work and play. Keep reading for more details.

Samsung ATIV Smart PC Review

Samsung ATIV 500T smart pc is a full Windows 8 device powered by Intel core i5 processor with 11.6 inch screen full HD 1920x1080, full 256 GiG SSD, and supports for 10 muti-finger touch.

It's blazingly fast and it has a spot for micro SD for expandable storage, a USB 3.0 port, a microphone, 3.5 millimeter headset jack, HDMI out, up and down volume, magnetic power spot, 2 speakers, and a home button.

There's also accessories you can buy like, the S Pen, full keyboard, cases that you can put on the back, ect..

Samsung ATIV accessories

This device highlights its speed and power with the flexibility of a tablet. I don't see any cons for this device, it's just simply amazing and highly recommended device.


Resources:

http://www.samsung.com/us/computer/pcs/XE500T1C-A01US-features

How to Dual-boot Windows 8.1 and Windows 7


Are you hesitant to upgrade to Windows 8.1 since you've heard that it has a huge adjustment from the good Windows 7? Then you should keep reading.

There is a way to use Windows 8.1 on your system while holding on to your Windows 7. This is possible by setting up a dual-boot system. Having a dual-boot system gives you an option on the startup on which version of Windows would you like the computer to start.

How to configure it? It's easy. Just make sure to follow the instructions.

The first thing we'll need to do is prepare the computer's configuration before proceeding to the actual Windows 8 setup. The first procedure will allow you to switch back and forth between operating systems at will. Note that, this configuration will only work with Windows Vista and Windows 7. If you're using Windows XP or Ubuntu, you can use the software EasyBCD.

1. For safety purposes, please backup your important documents, files, pictures, etc...

1. Go to the start menu and type "backup" Click on backup and restore.
bakup and restore tech4windows

2. Backup your computer.
bakup and restore tech4windows

2. Create at least 16GB (20GB for 64-bit Windows 8.1) Partition.

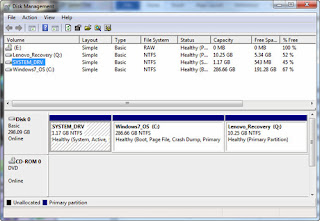
1. Go to start and type "disk management" and click on "Create and format disk partitions".

create and format hard disk partition

        2. Right click on the partion with the largest memory, and click on Shrink Volume from the context menu.

shrink partition

        3. It will tell you how much free space can be squeezed out of the drive in MB. For 32-bit version enter at least 16GB, and if you're using 64-bit enter 20GB then click on the Shrink button. That's it.


3. If you have a Windows 8 disc, then much better. You can install Windows 8, then upgrade it to Windows 8.1, or you can directly install Windows 8.1 preview. If you have 32-bit, then select Windows 8.1 32-bit, or 64-bit. Another tool you need is the Windows 7 USB/DVD Download tool, and a flash drive with at has at least 4GB space.

Create a DVD or bootable USB ISO file using Windows 7 USB/DVD Download tool by click on it and select the Windows 8.1 ISO file you have downloaded. Follow the very easy instructions.

4. Install Windows 8.1 using the bootable USB or DVD you've created in the previous step.

1. Insert the USB drive or DVD, then restart the computer. Press any key while the computer is rebooting so it will start on the Flashdrive or DVD.

2. Select your language and click "Install Now" and type the product key. For example, NTTX3-RV7VB-T7X7F-WQYYY-9Y92F for the preview version. Accept the software license agreeent and select "Custom Install" NOT upgrade.

3. Select the partion you've created in step 2, then click on "Drive Options (advanced)" then format the partition.

selecting unallocated space

4. Select the Unallocated Space again and click Next to proceed with the installation of Windows 8.

Windows 7 and Windows 8.1 dual-boot

The installation may take a couple of minutes. Once its completed, you will have the option to select which version of Windows you would like your computer to start.

Thanks for reading. If you have any clarifications, questions, you can leave a comment below.


Resources:

http://windows.microsoft.com/en-us/windows-8/update-from-preview
http://www.microsoftstore.com/store/msusa/html/pbPage.Help_Win7_usbdvd_dwnTool
http://www.pcmag.com/